We are so excited you're choosing Zola for your paper needs!
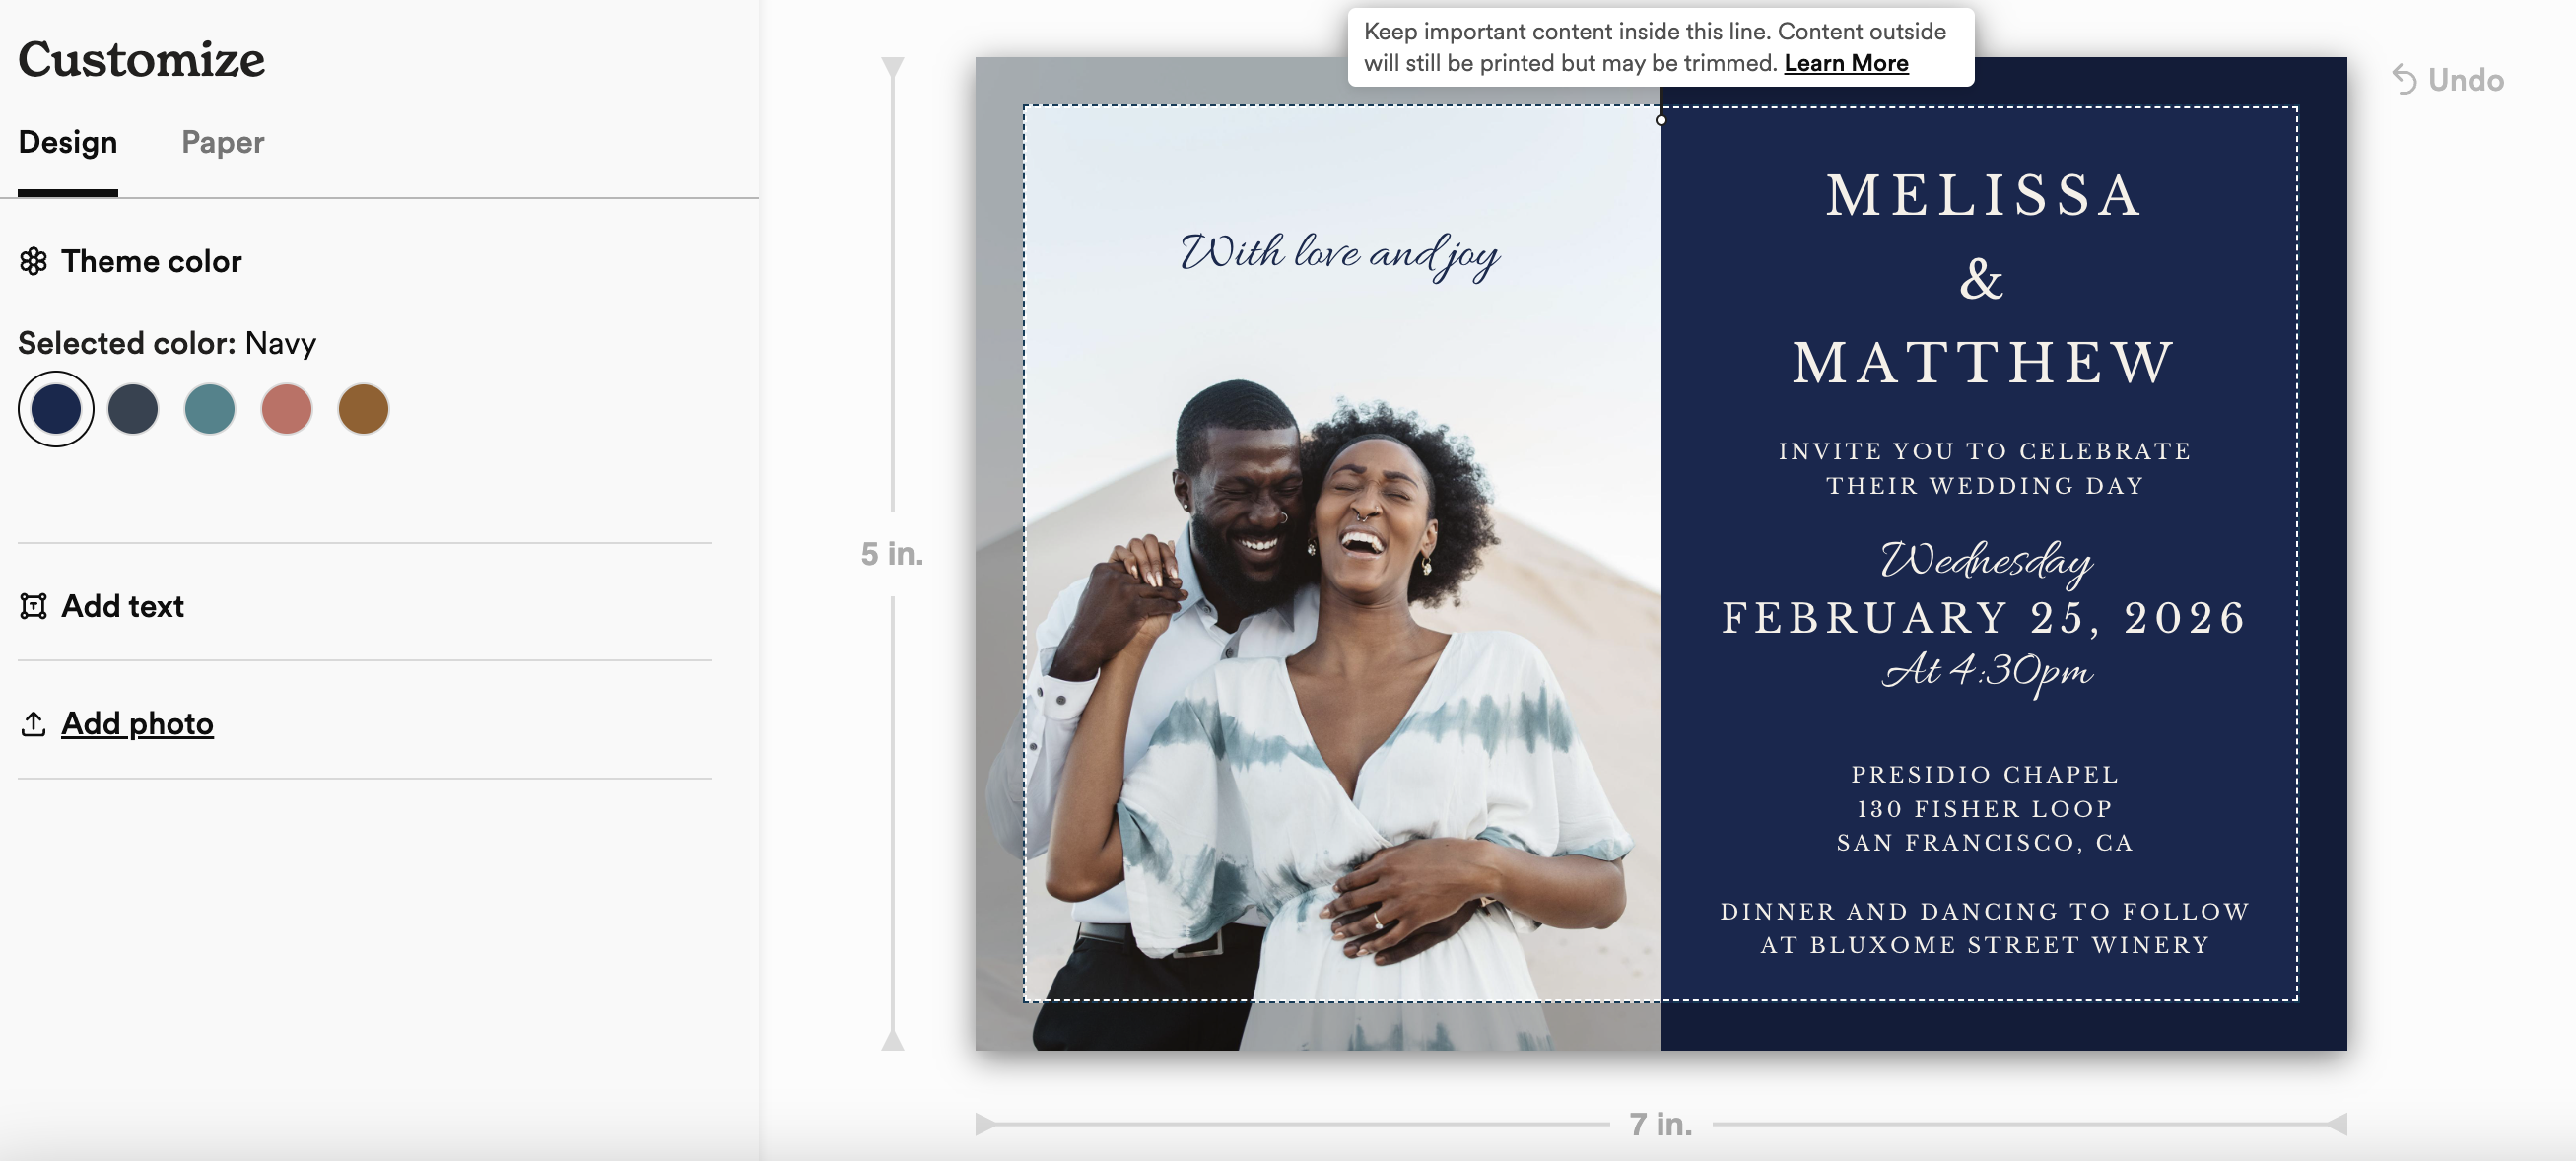
To begin, you'll want to choose your design! After you've selected your paper product color, paper type, optional foil, silhouette and estimated quantity, click “customize design” and start your draft.
Once that is all set, here's how to upload your photo on your paper type:
- To upload your photo(s) select the 'Add Photo' option on your draft:

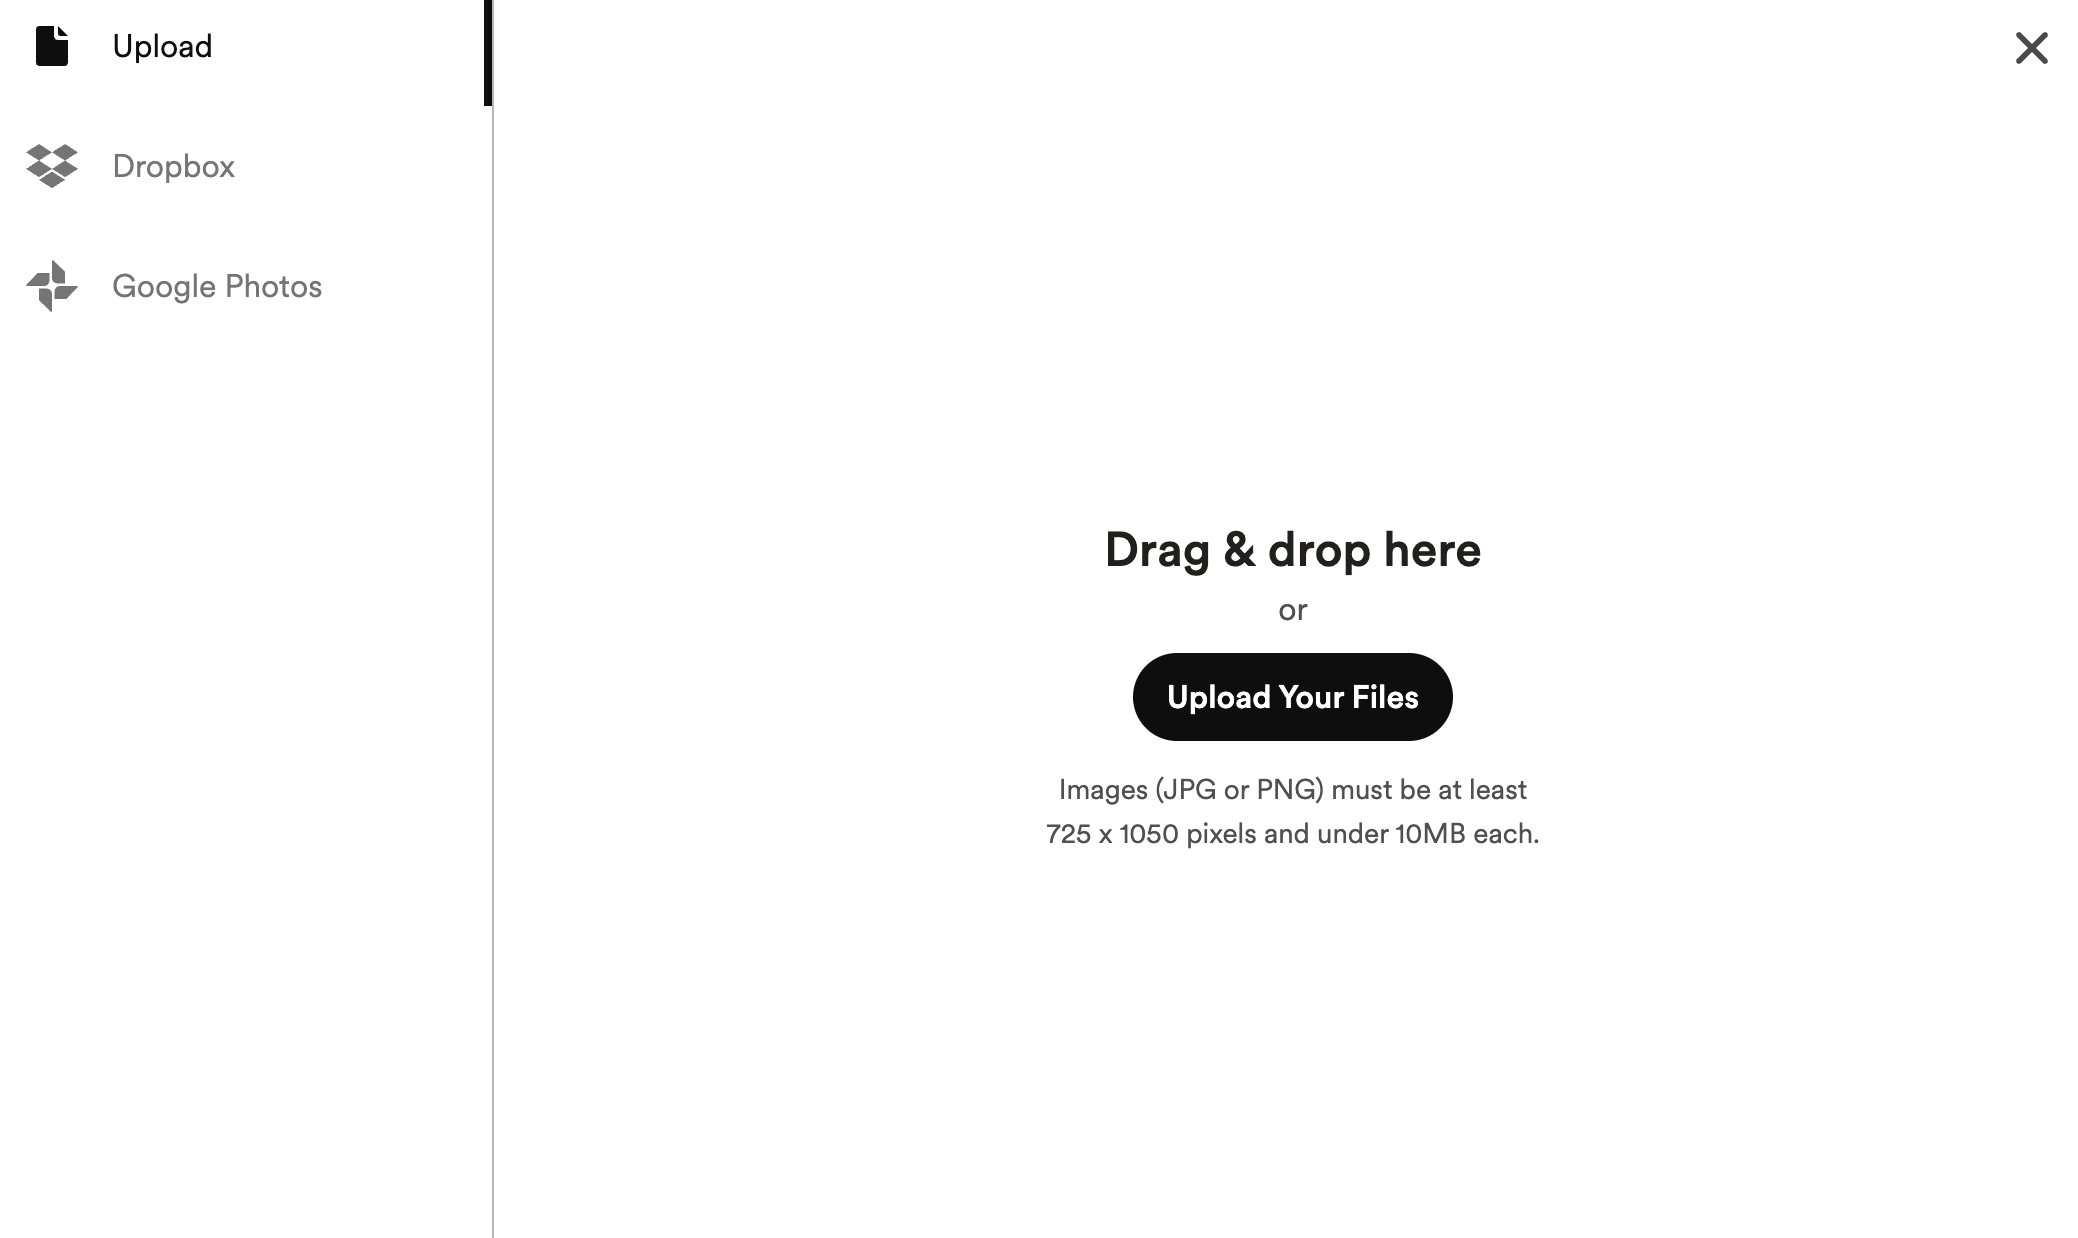
This will bring up our photo uploading window. You have several options to choose from here. You can upload photos directly from your computer, Dropbox, Google photos, or simply drag and drop!
Make sure to double check that the photo you are uploading is:
- Either a JPG, PNG
- Pixel minimums will vary depending on your card design. Minimums will be listed on the photo uploader tool.
- Smaller than 10MB
- If you need to resize your photo we recommend using PicResize.

-
Once your photo is uploaded, you can crop, mirror, enhance, sharpen, blur or change your image to black and white. Click “save” to save your image!
-
Some designs will also allow you to print on that back. To enable this option click the toggle icon “print on the back” and “add photo” and proceed to upload your photo with the previous steps.
If you find that you're having trouble uploading your photo after following this guide, please email Team-Z.